Third Saturday: Video Art
The UMFA has several works of video art in the collection. Let’s look at one of these works by William Lamson to get inspiration to make our own movie art. Using an age-old technique of movie magic, we will construct a rolling paper cinema using household items.
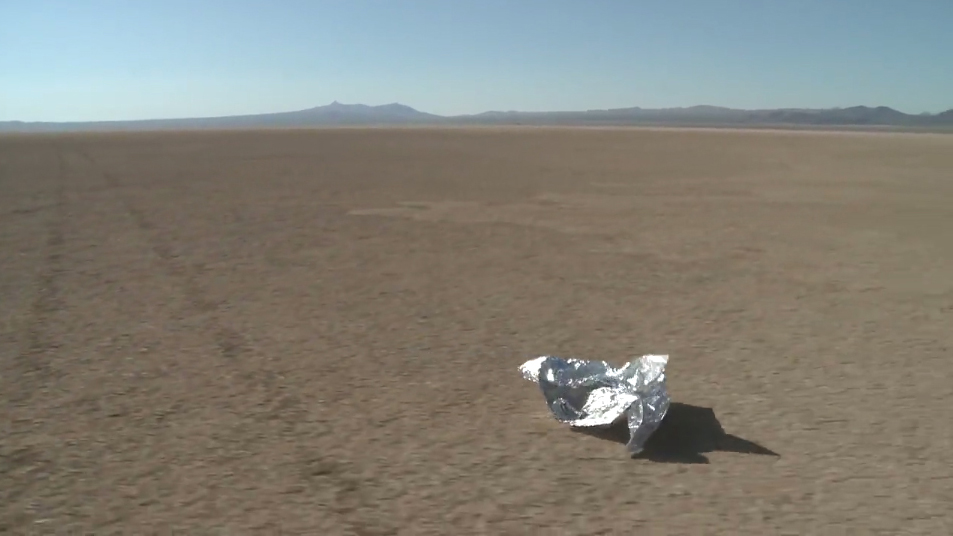
The picture above is a still image taken from a video artwork by William Lamson in the UMFA collection. You can look at the video art here: Untitled (Mylar) from William Lamson on Vimeo.
Watch the video closely, try to watch the whole thing, it's only 3:44 minutes long. Let’s think about how Lamson made the artwork. What is the camera focused on? What clues can you find that show what he traveled in to film?
What is the landscape like? Notice how in the video, it is mostly the landscape background that moves while the piece of silver fabric, called Mylar, stays in the center of the video. Why do you think the artist made the video that way?
Describe the movement of the Mylar with some adjectives that give you the mood of its movement. How does the silver Mylar contrast with the desert landscape?
Think about all of the choices the artist made to create this video: the objects he filmed, the landscape he chose, the colors that were highlighted in the video. All of these are choices that the artist made to create a video art piece.
You will make these same choices when you make your moving artwork, too!
Let’s Make a Movie
Let’s make our own moving artwork. Like the video art we saw, you will have one object that is the focus of the artwork. That object will stay still while the background moves, giving the illusion that the still object is moving. This type of movie is called a conveyor belt movie.
Before you begin to construct your conveyor belt movie, you need to make some choices:
- What object will you feature?
- What background will you draw?
- How detailed do you want to make your background?
- What colors will you use to help draw a viewer’s attention?
Directions:
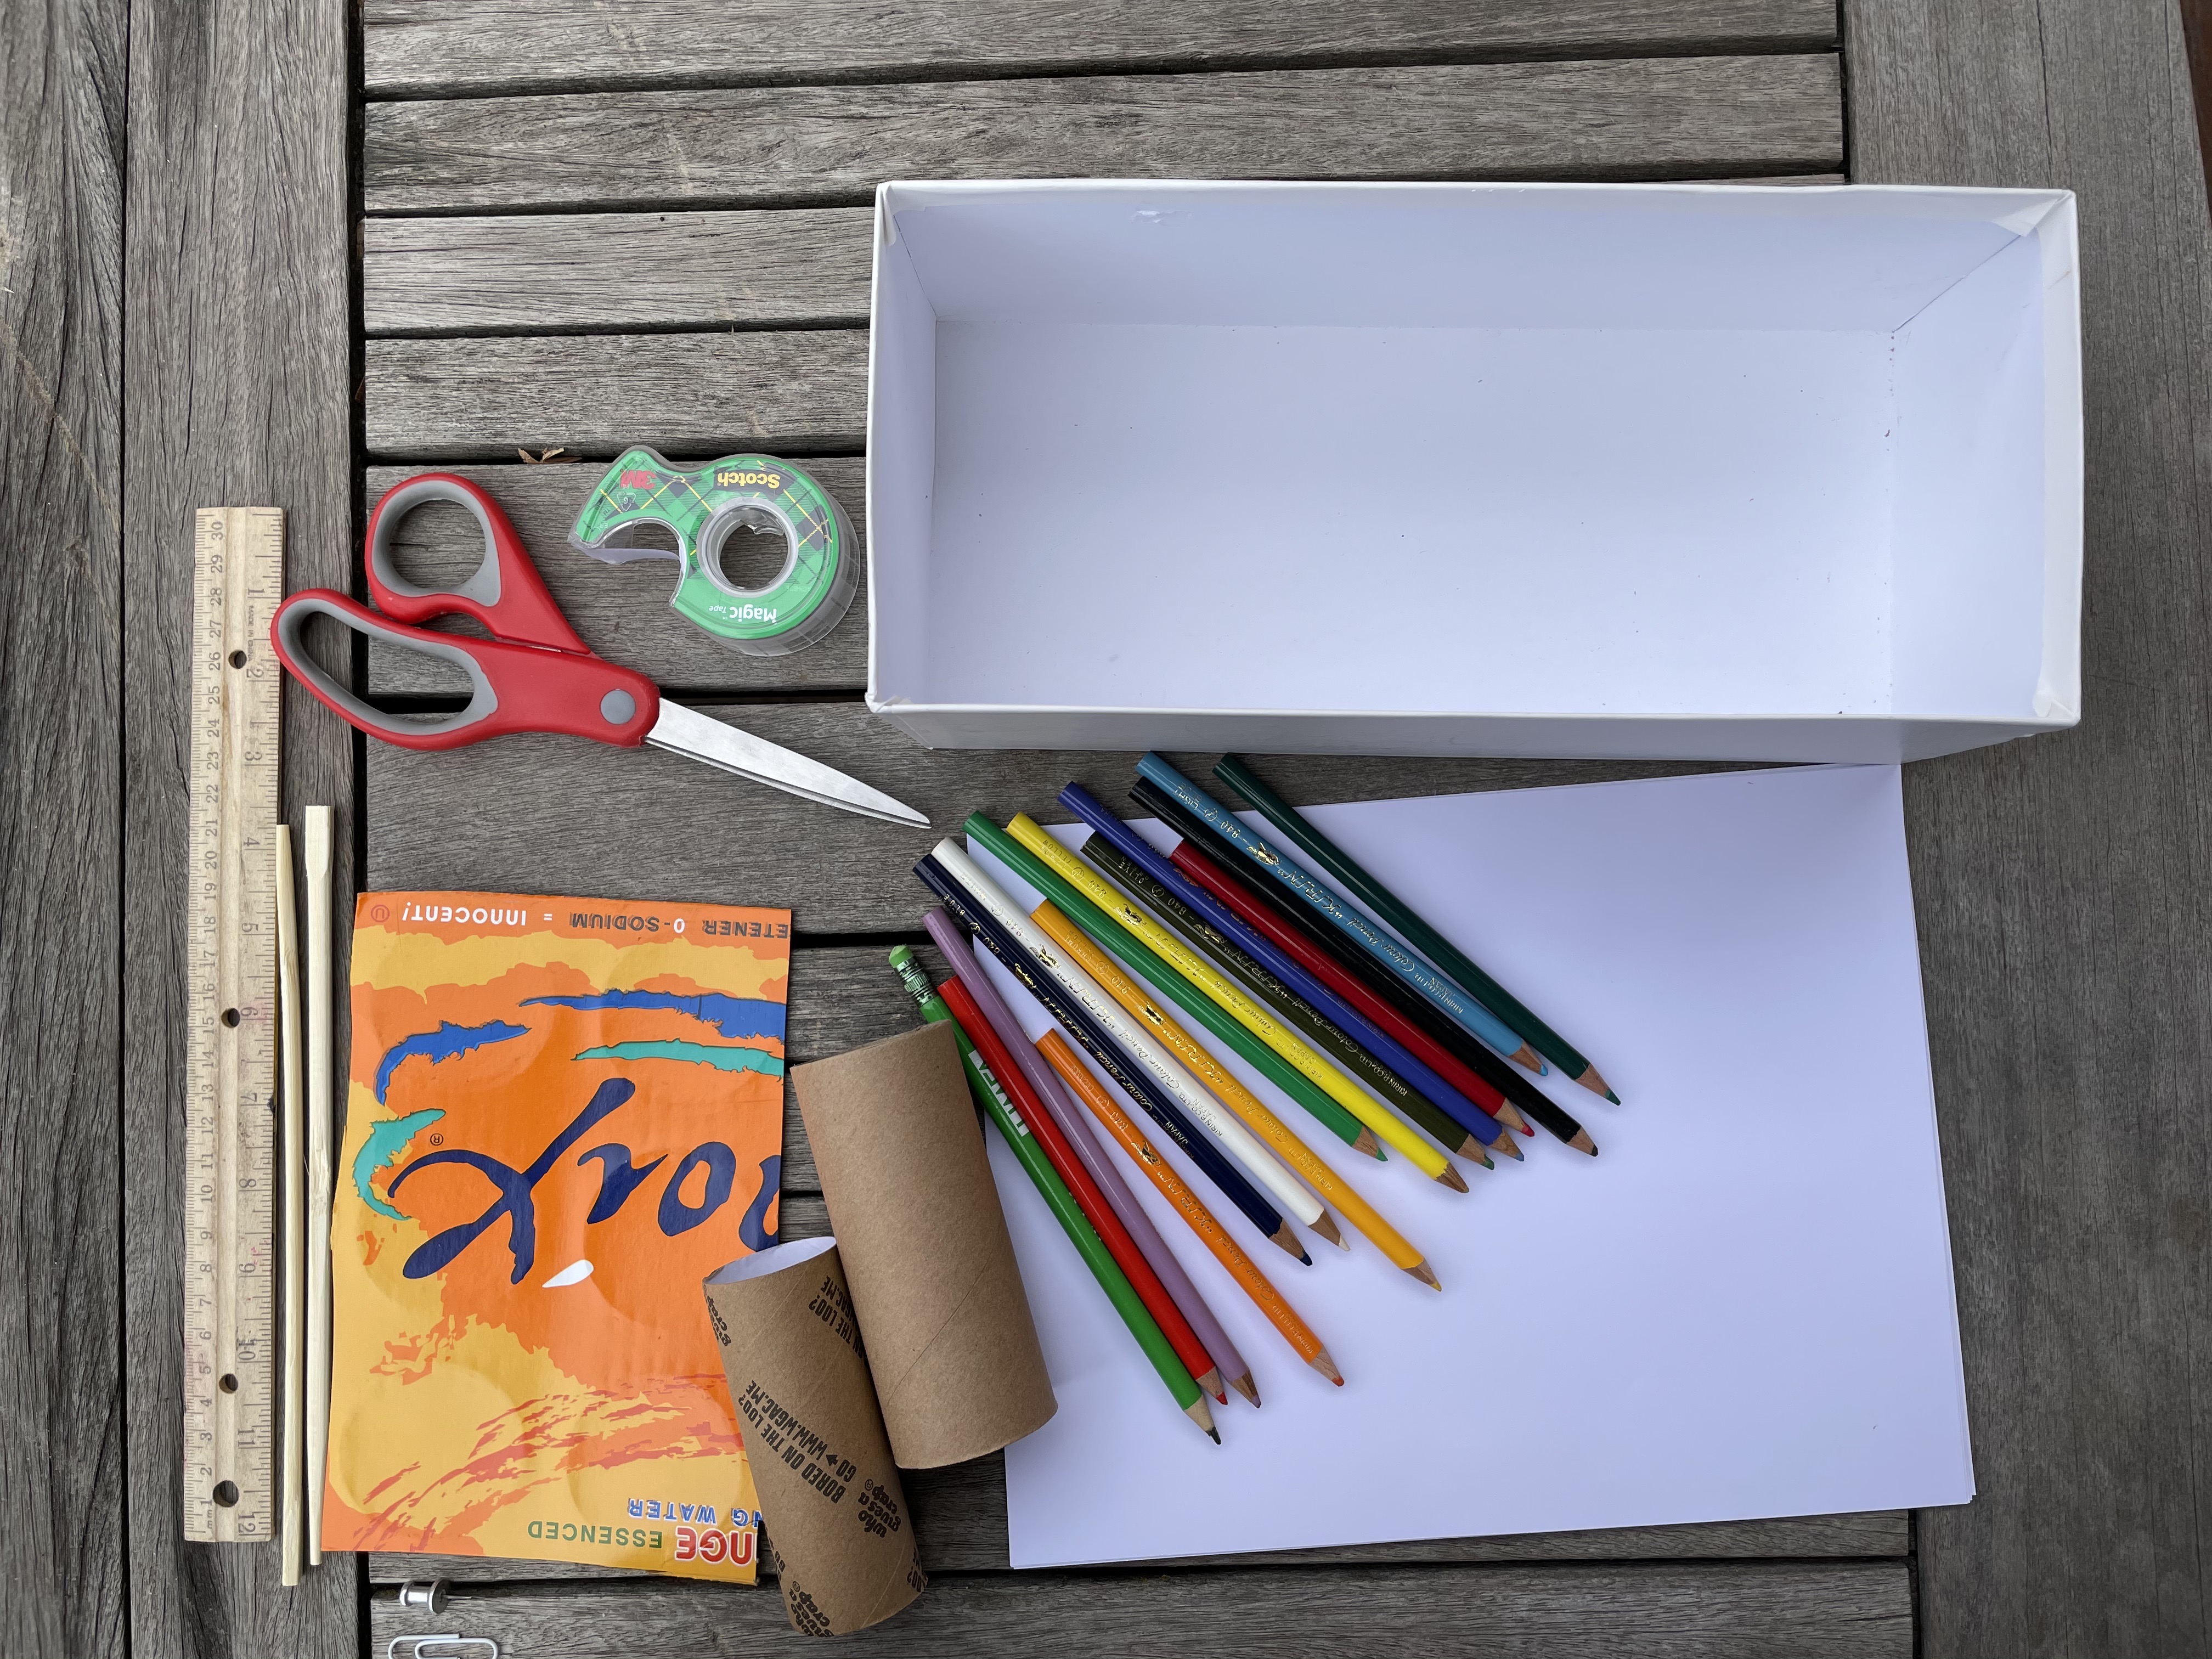
Materials:
- Shoebox or similar size box
- 2 toilet paper tubes
- Piece of thin cardboard like a cereal box
- 2 dowels (chopsticks work great!)
- Paper
- Colored pencils
- Paperclip
- Pushpin
- Tape
- Scissors
- Ruler
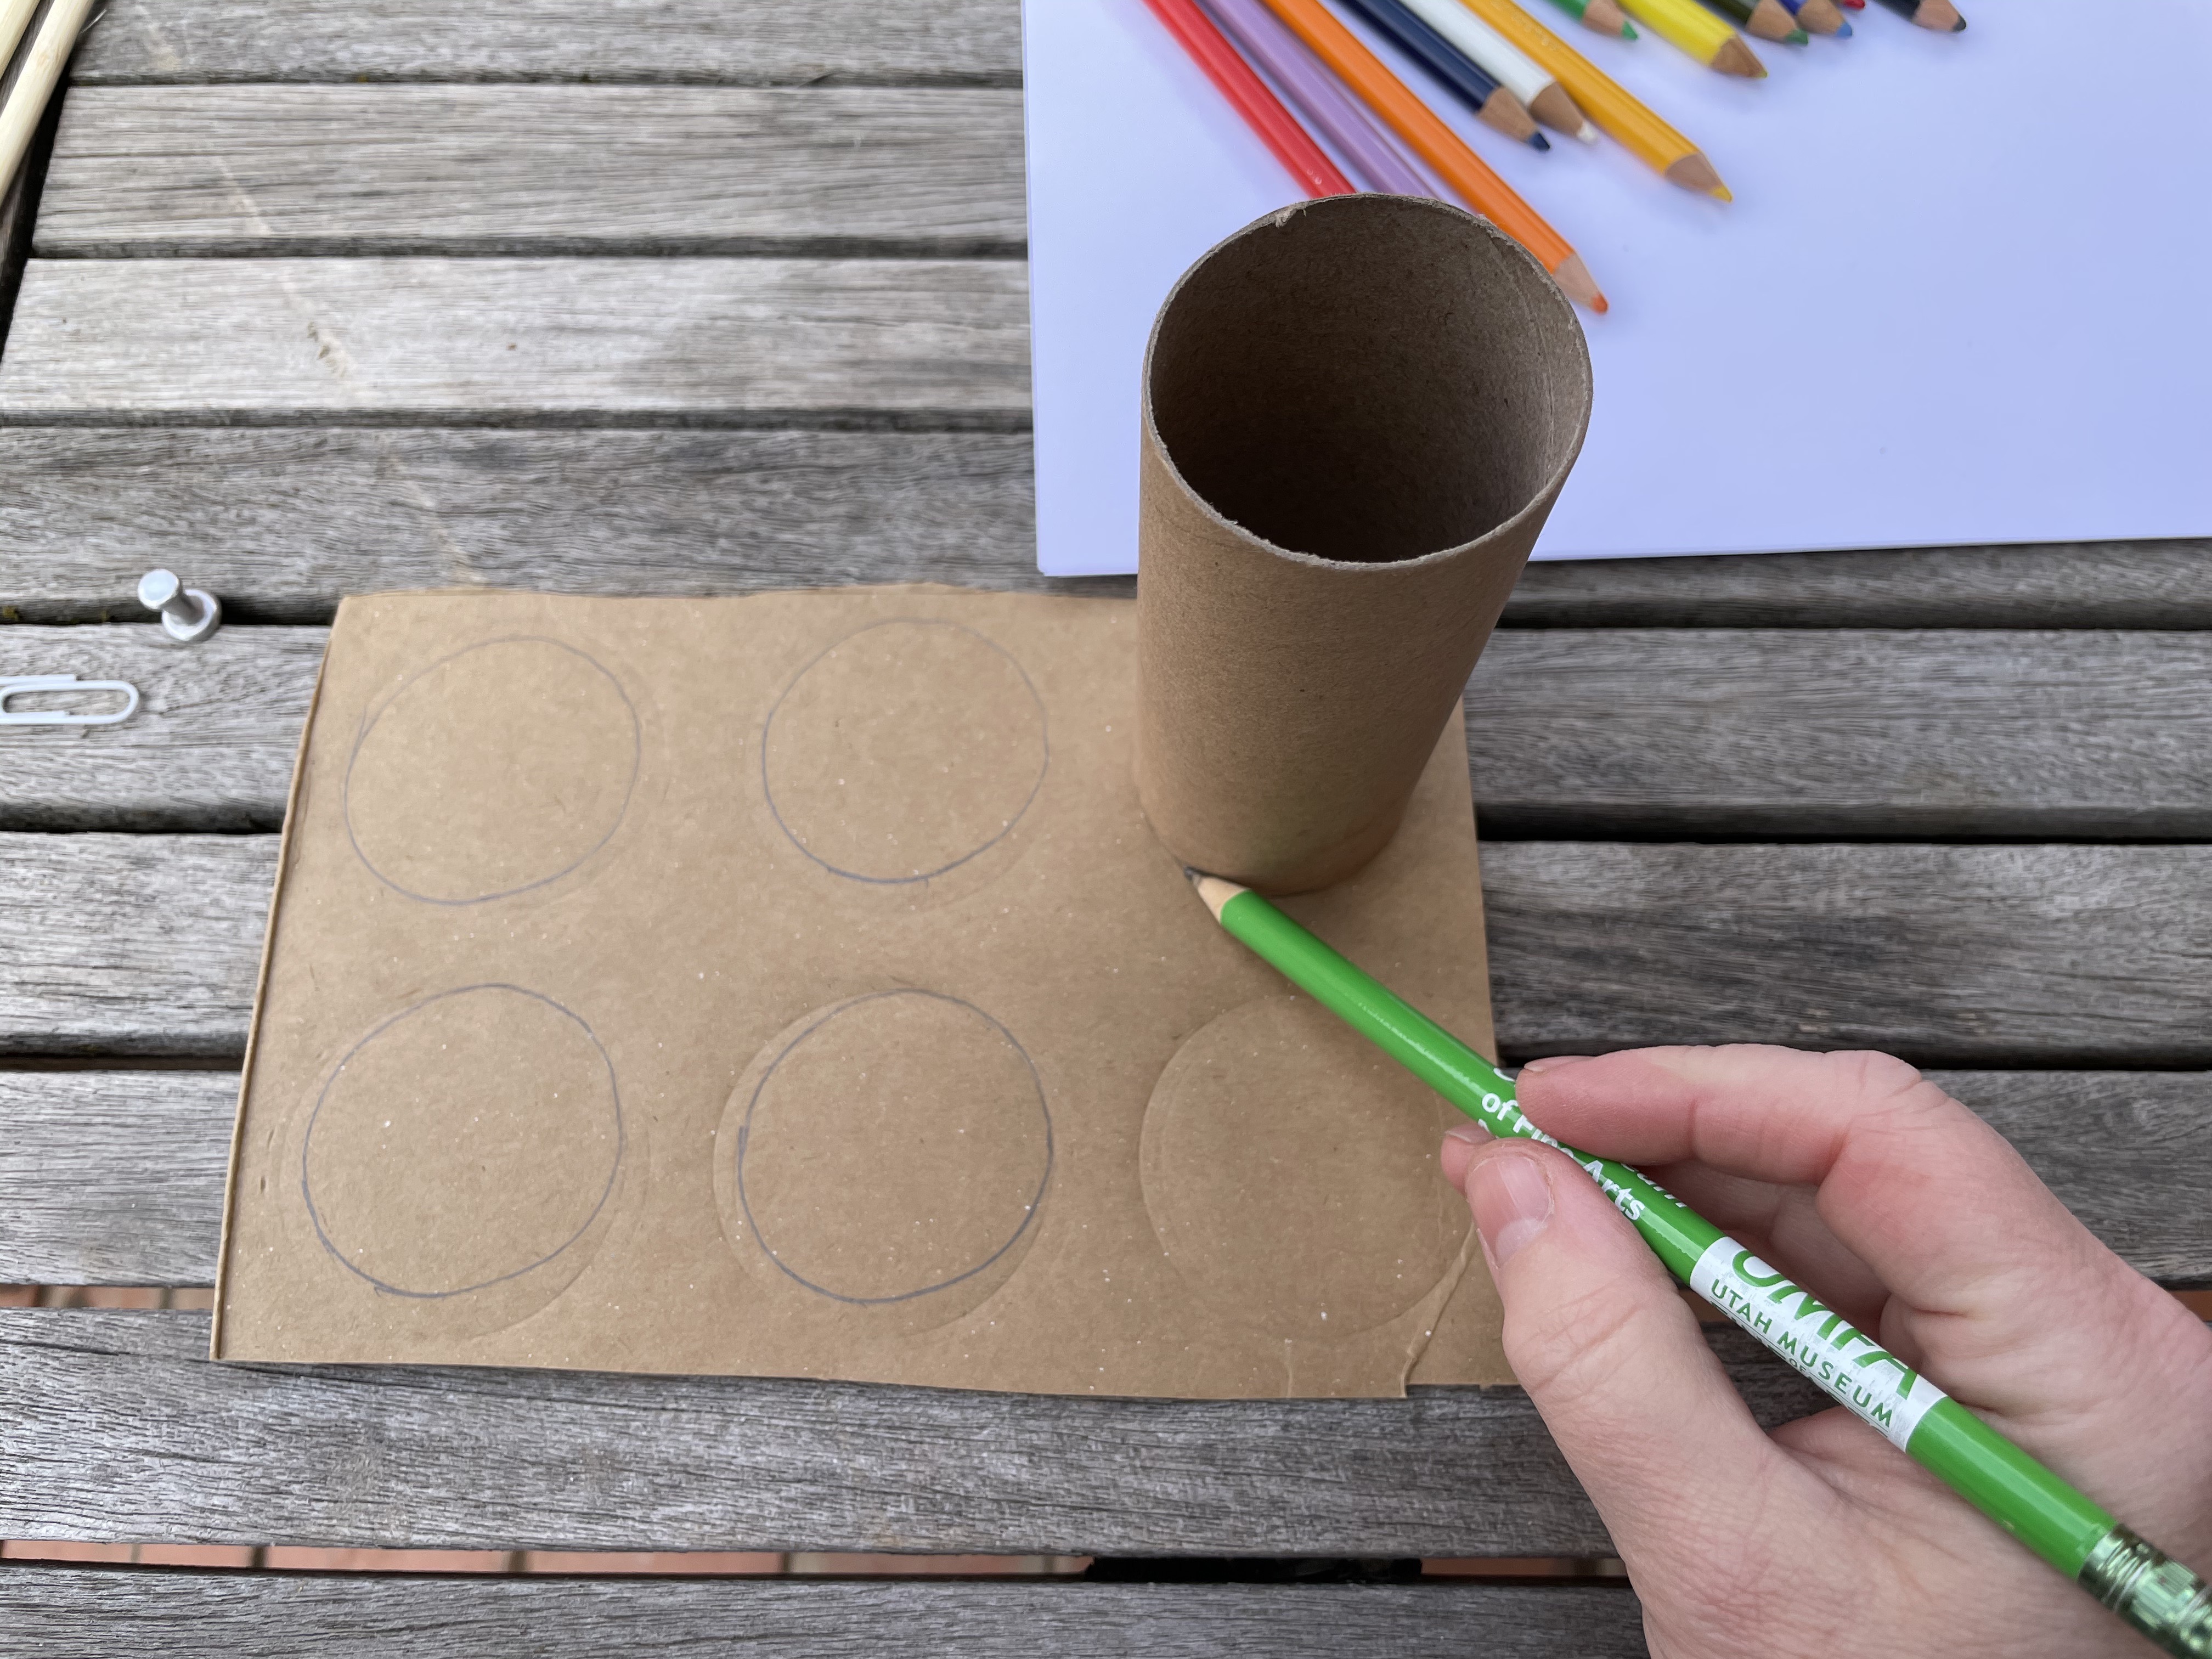
Trace the end of a toilet paper tube onto a piece of lightweight cardboard four times. Then, cut each circle out.
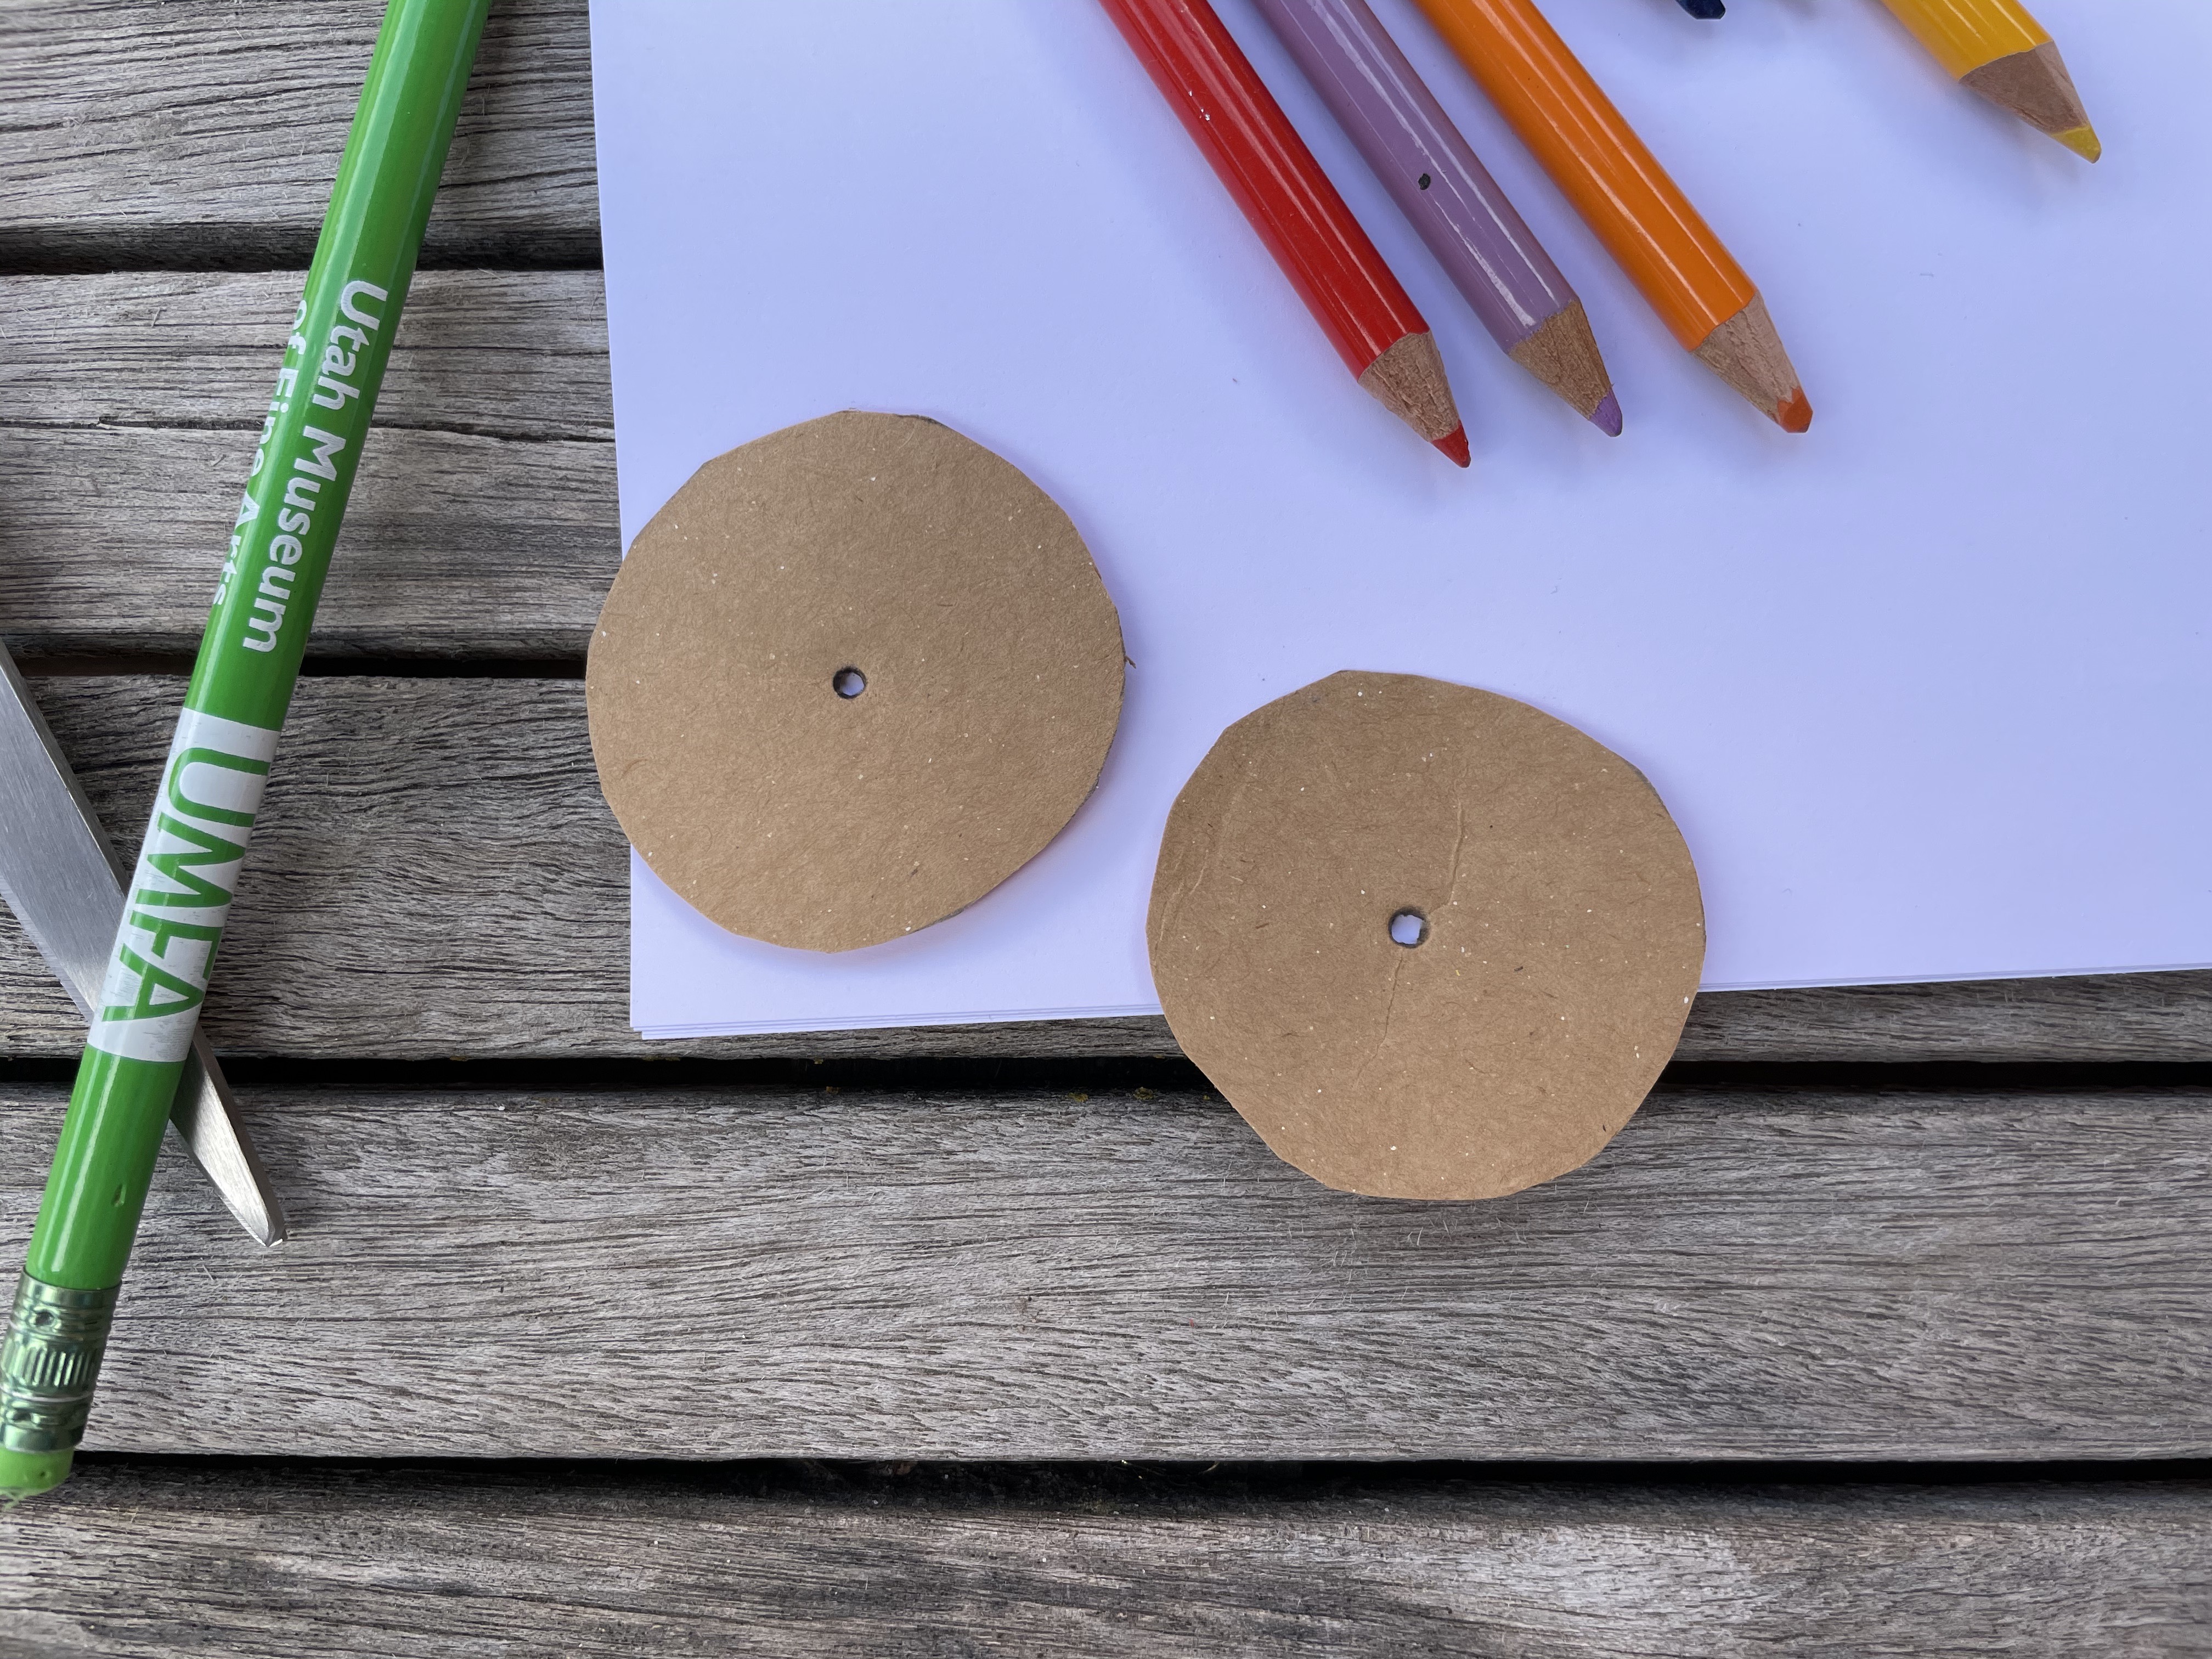
Make a hole in the center of each of the circles large enough for the dowel to fit snugly into.
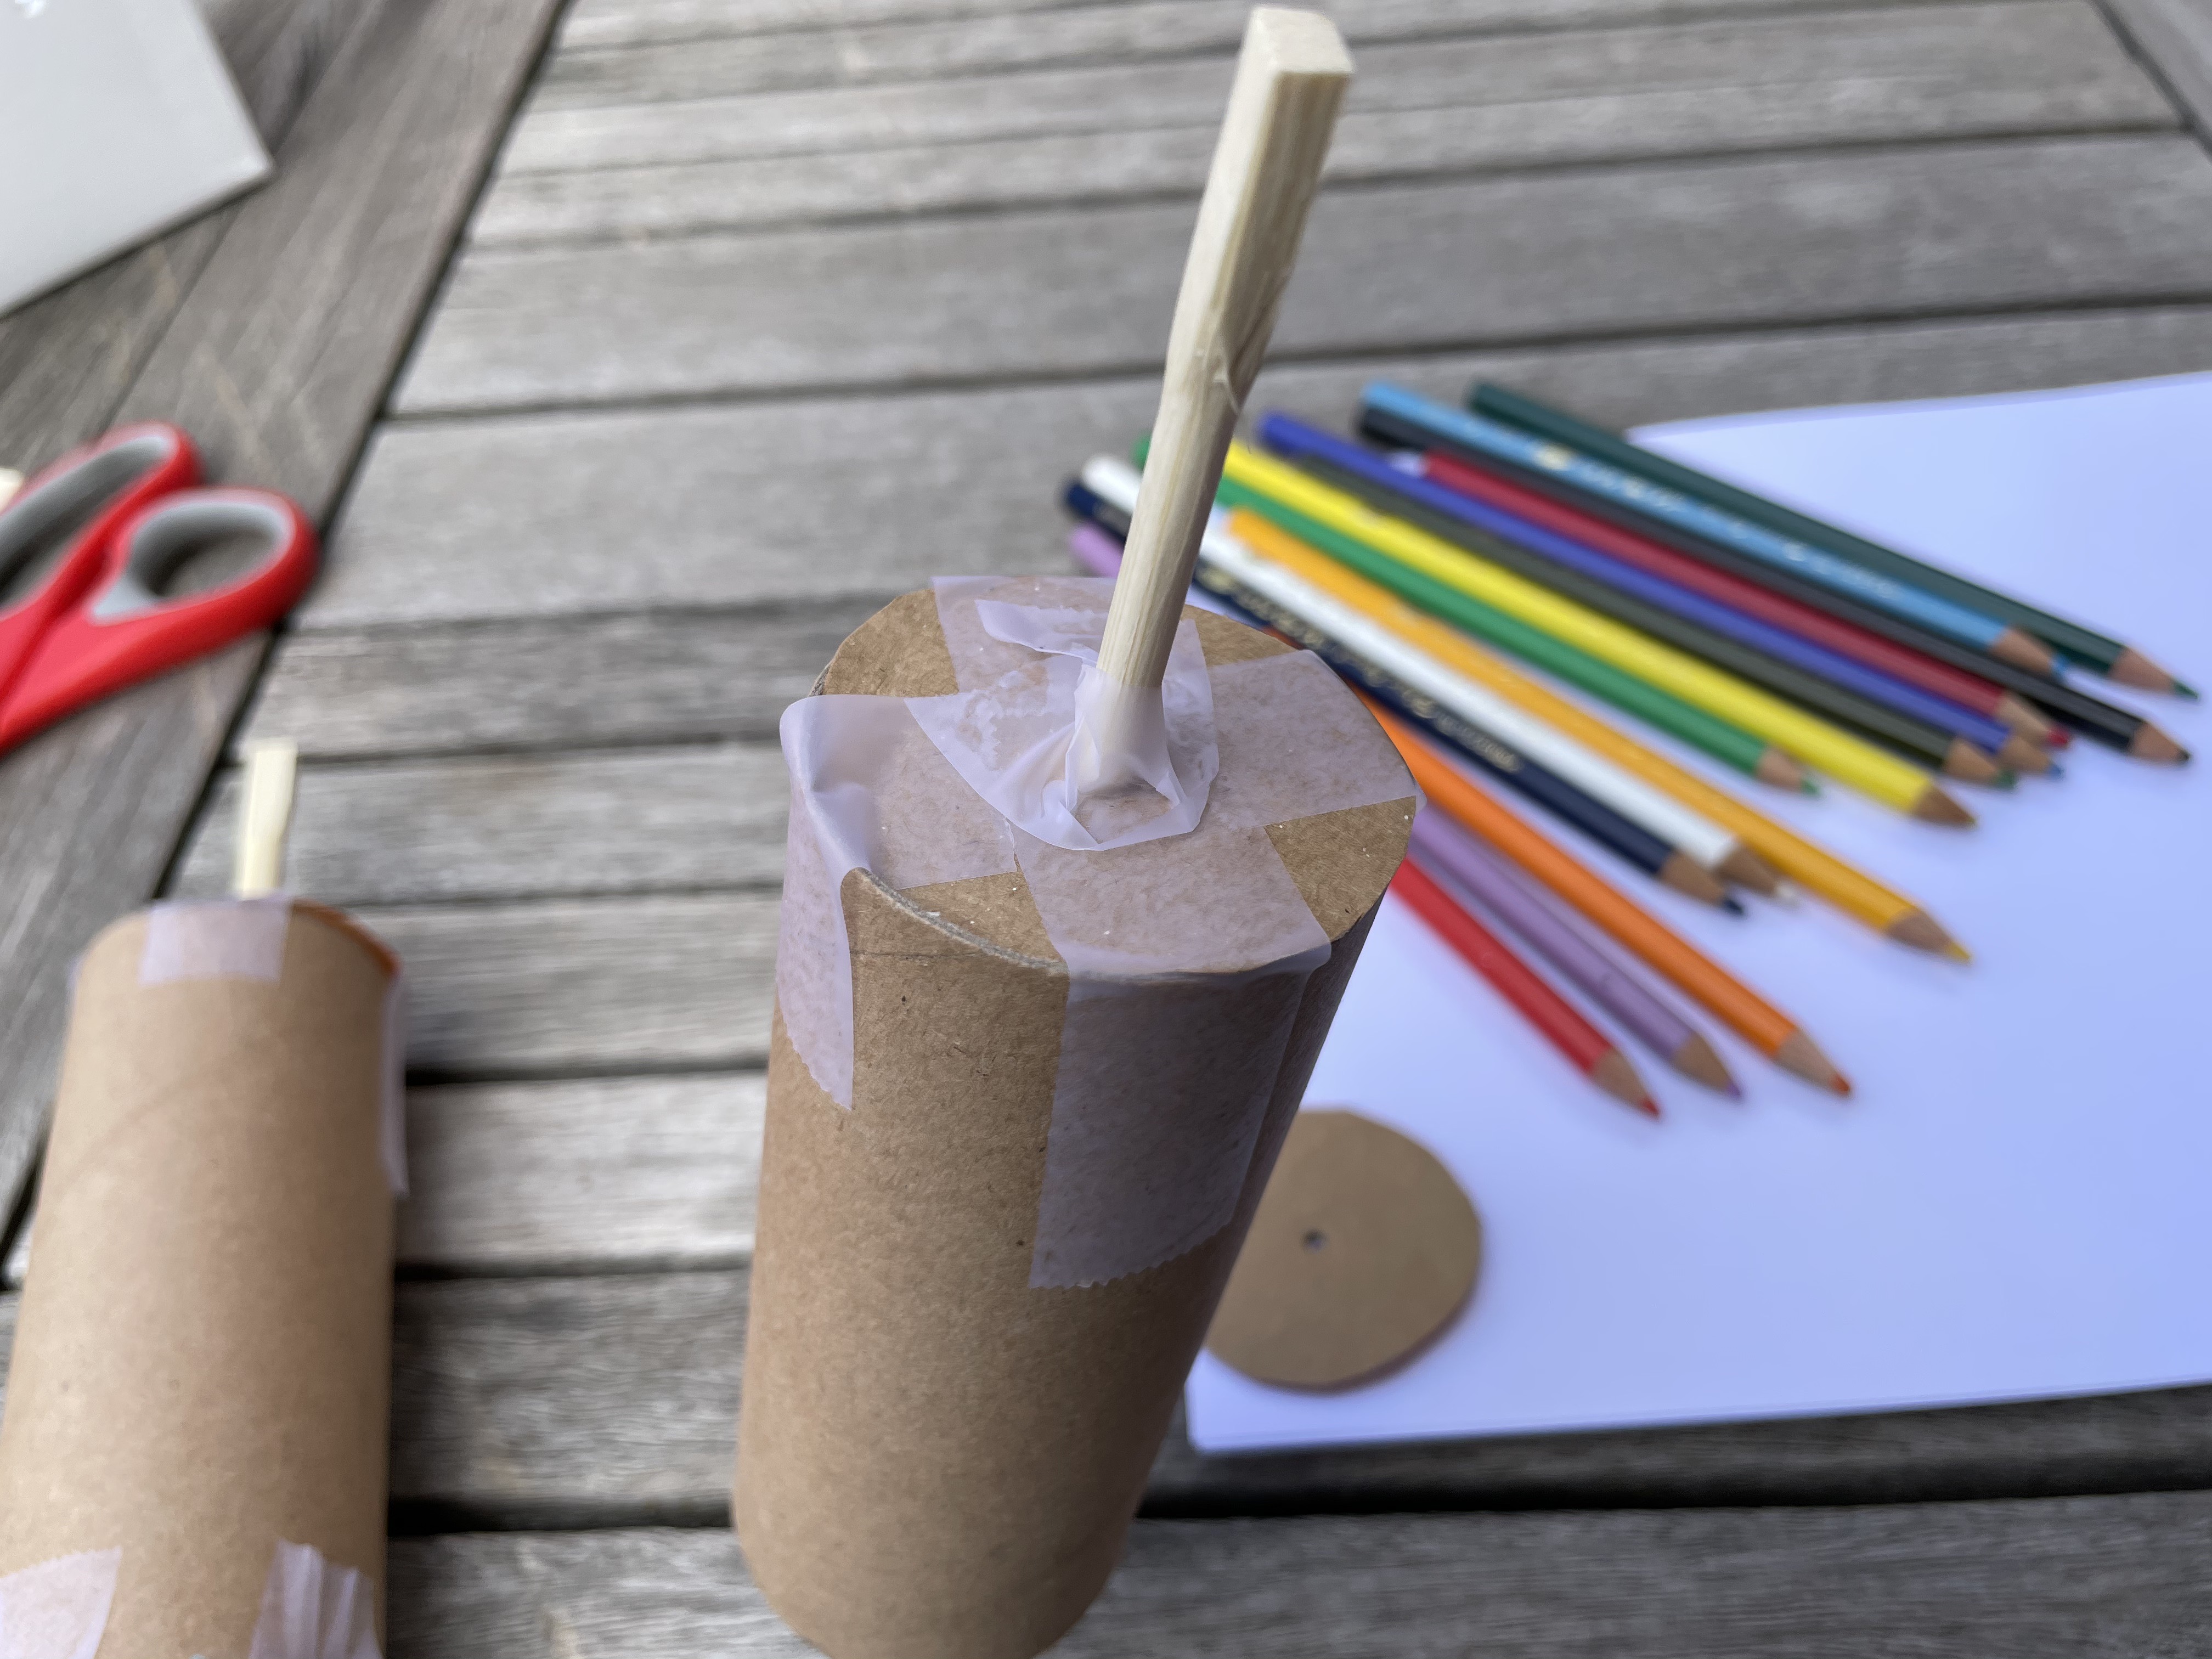
Gently push one dowel through a circle, then through a toilet paper tube. Put a circle on the end of the dowel. Tape the circles onto the ends of each of the tubes. Then tape the dowel to the cardboard circle. You want to make sure the dowel and the tube rotate together as one.
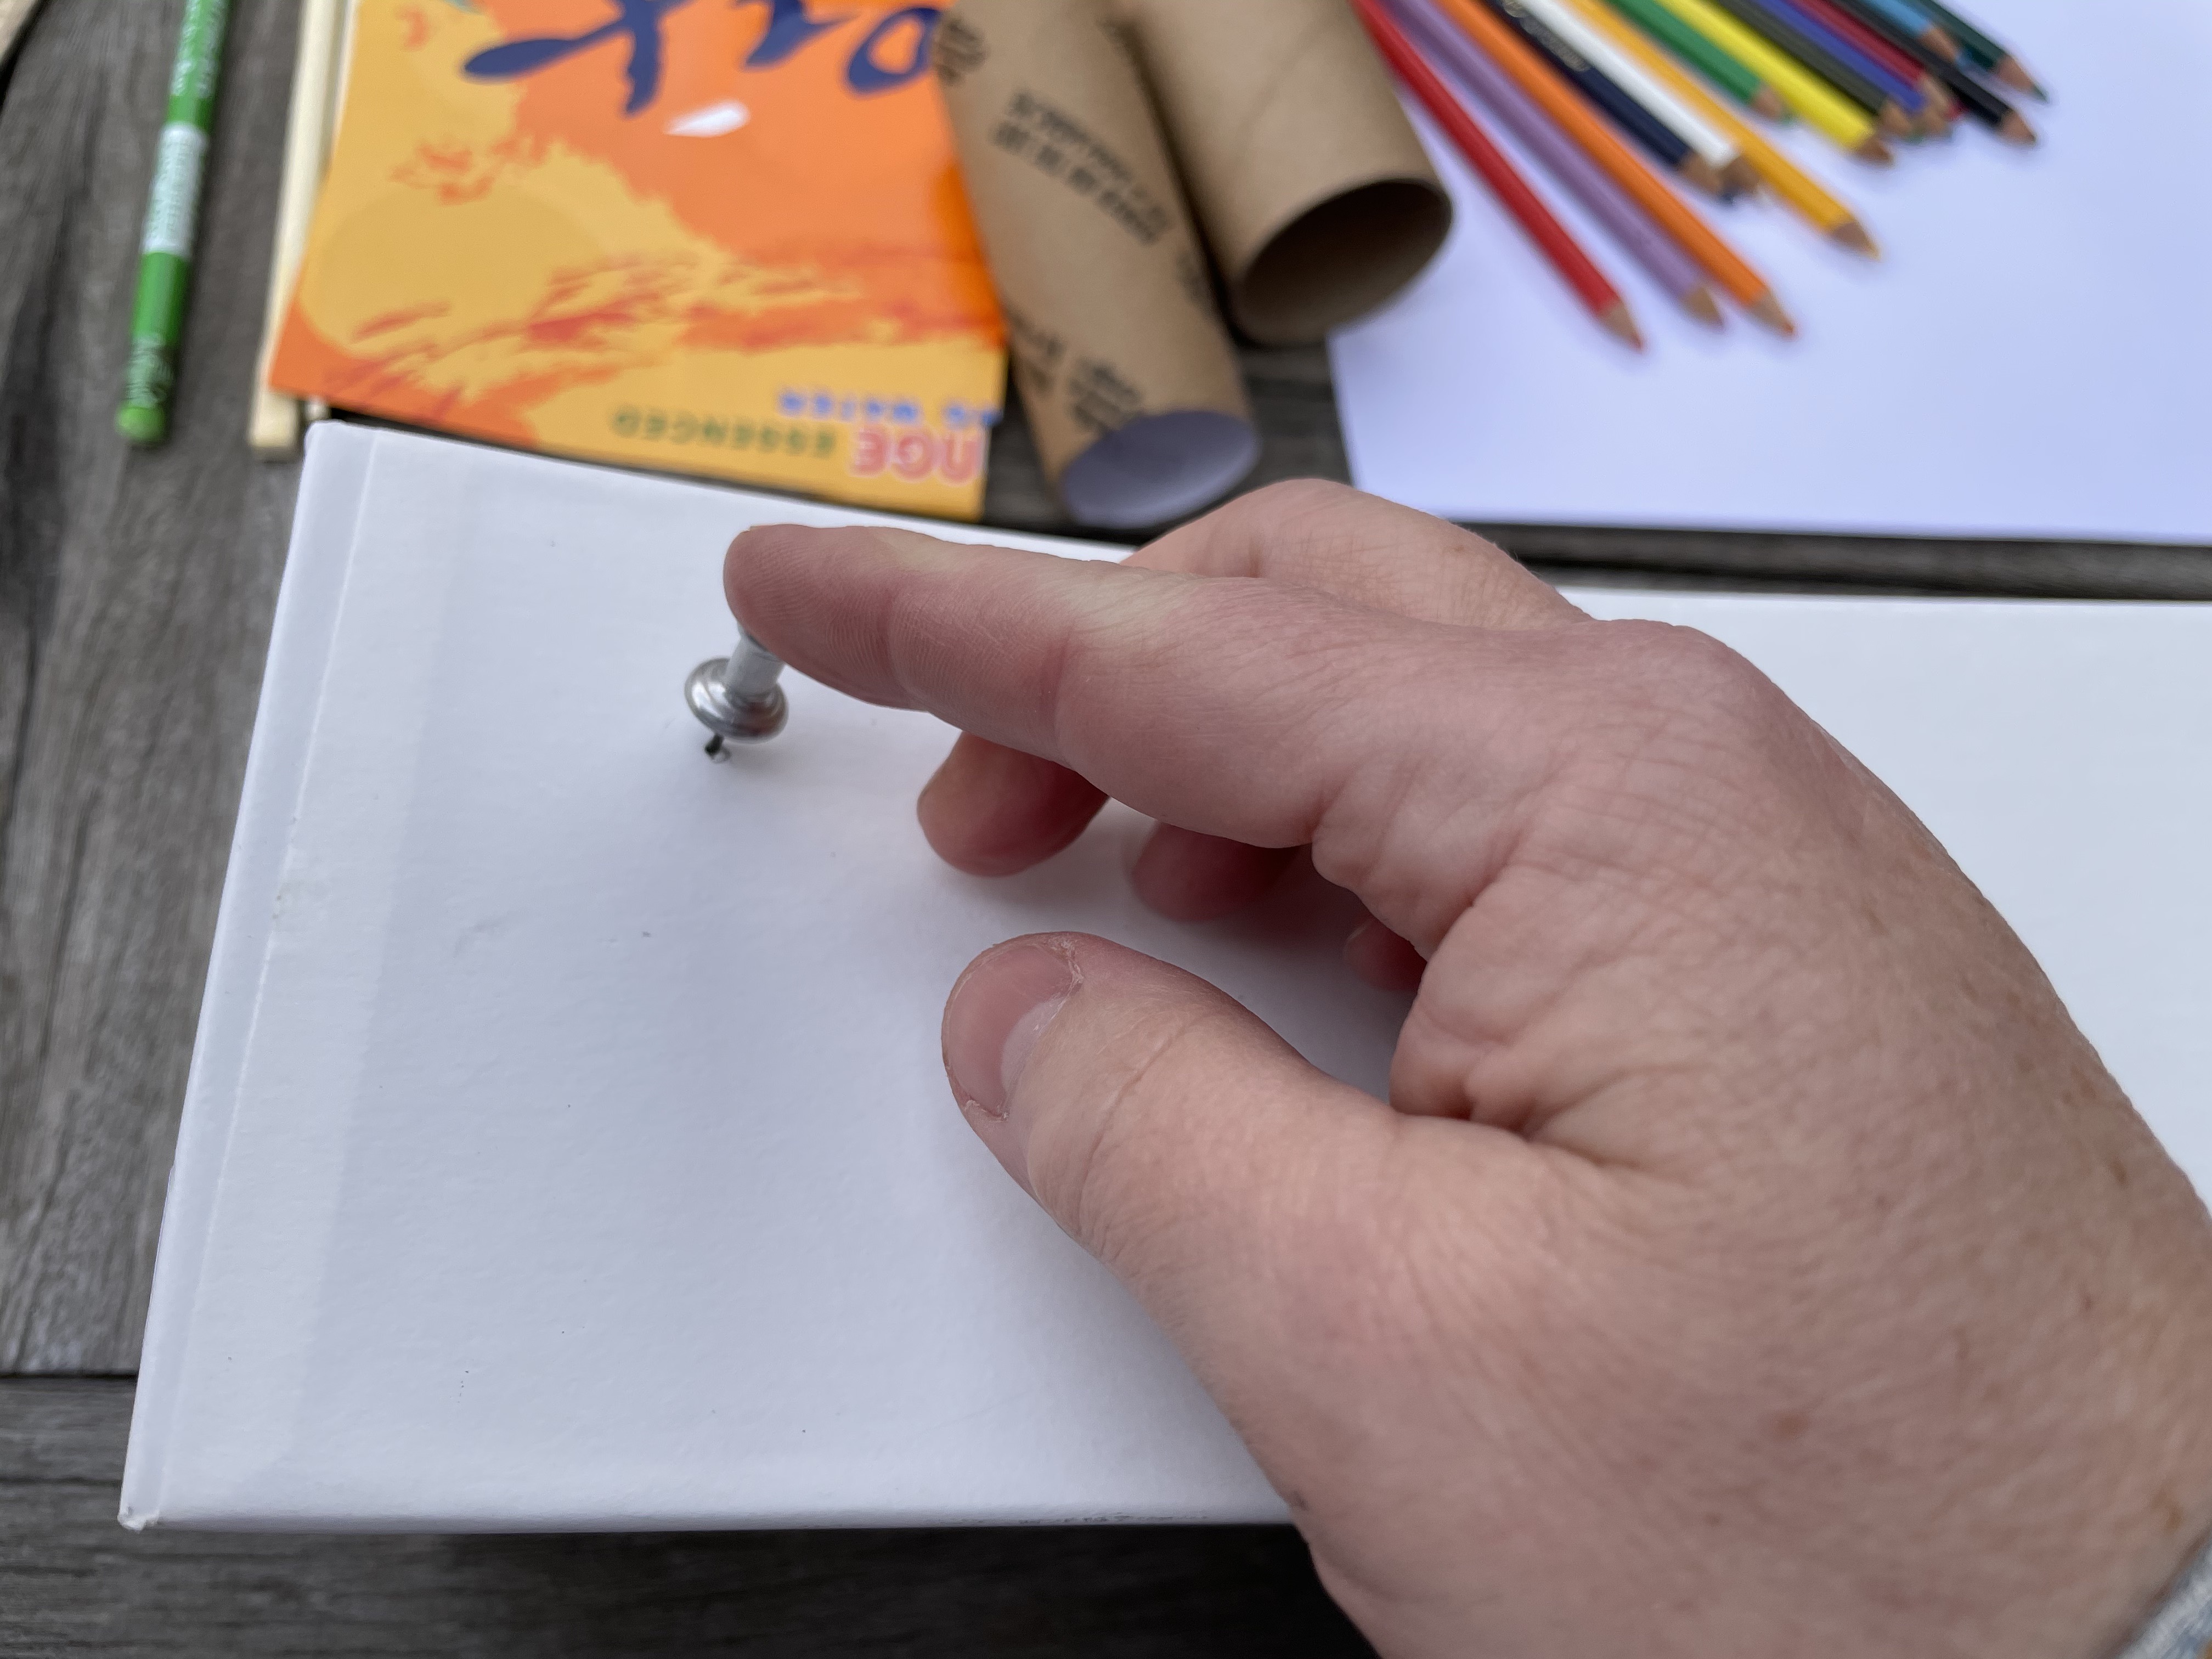
With the lid off of the box, use a pushpin to make two holes on either side of the long sides of the box about 2” from each end of the box. Widen the holes with a pair of scissors or pencil until the dowel fits loosely into them.
Insert each end of both dowels into the holes opposite each other on the box.
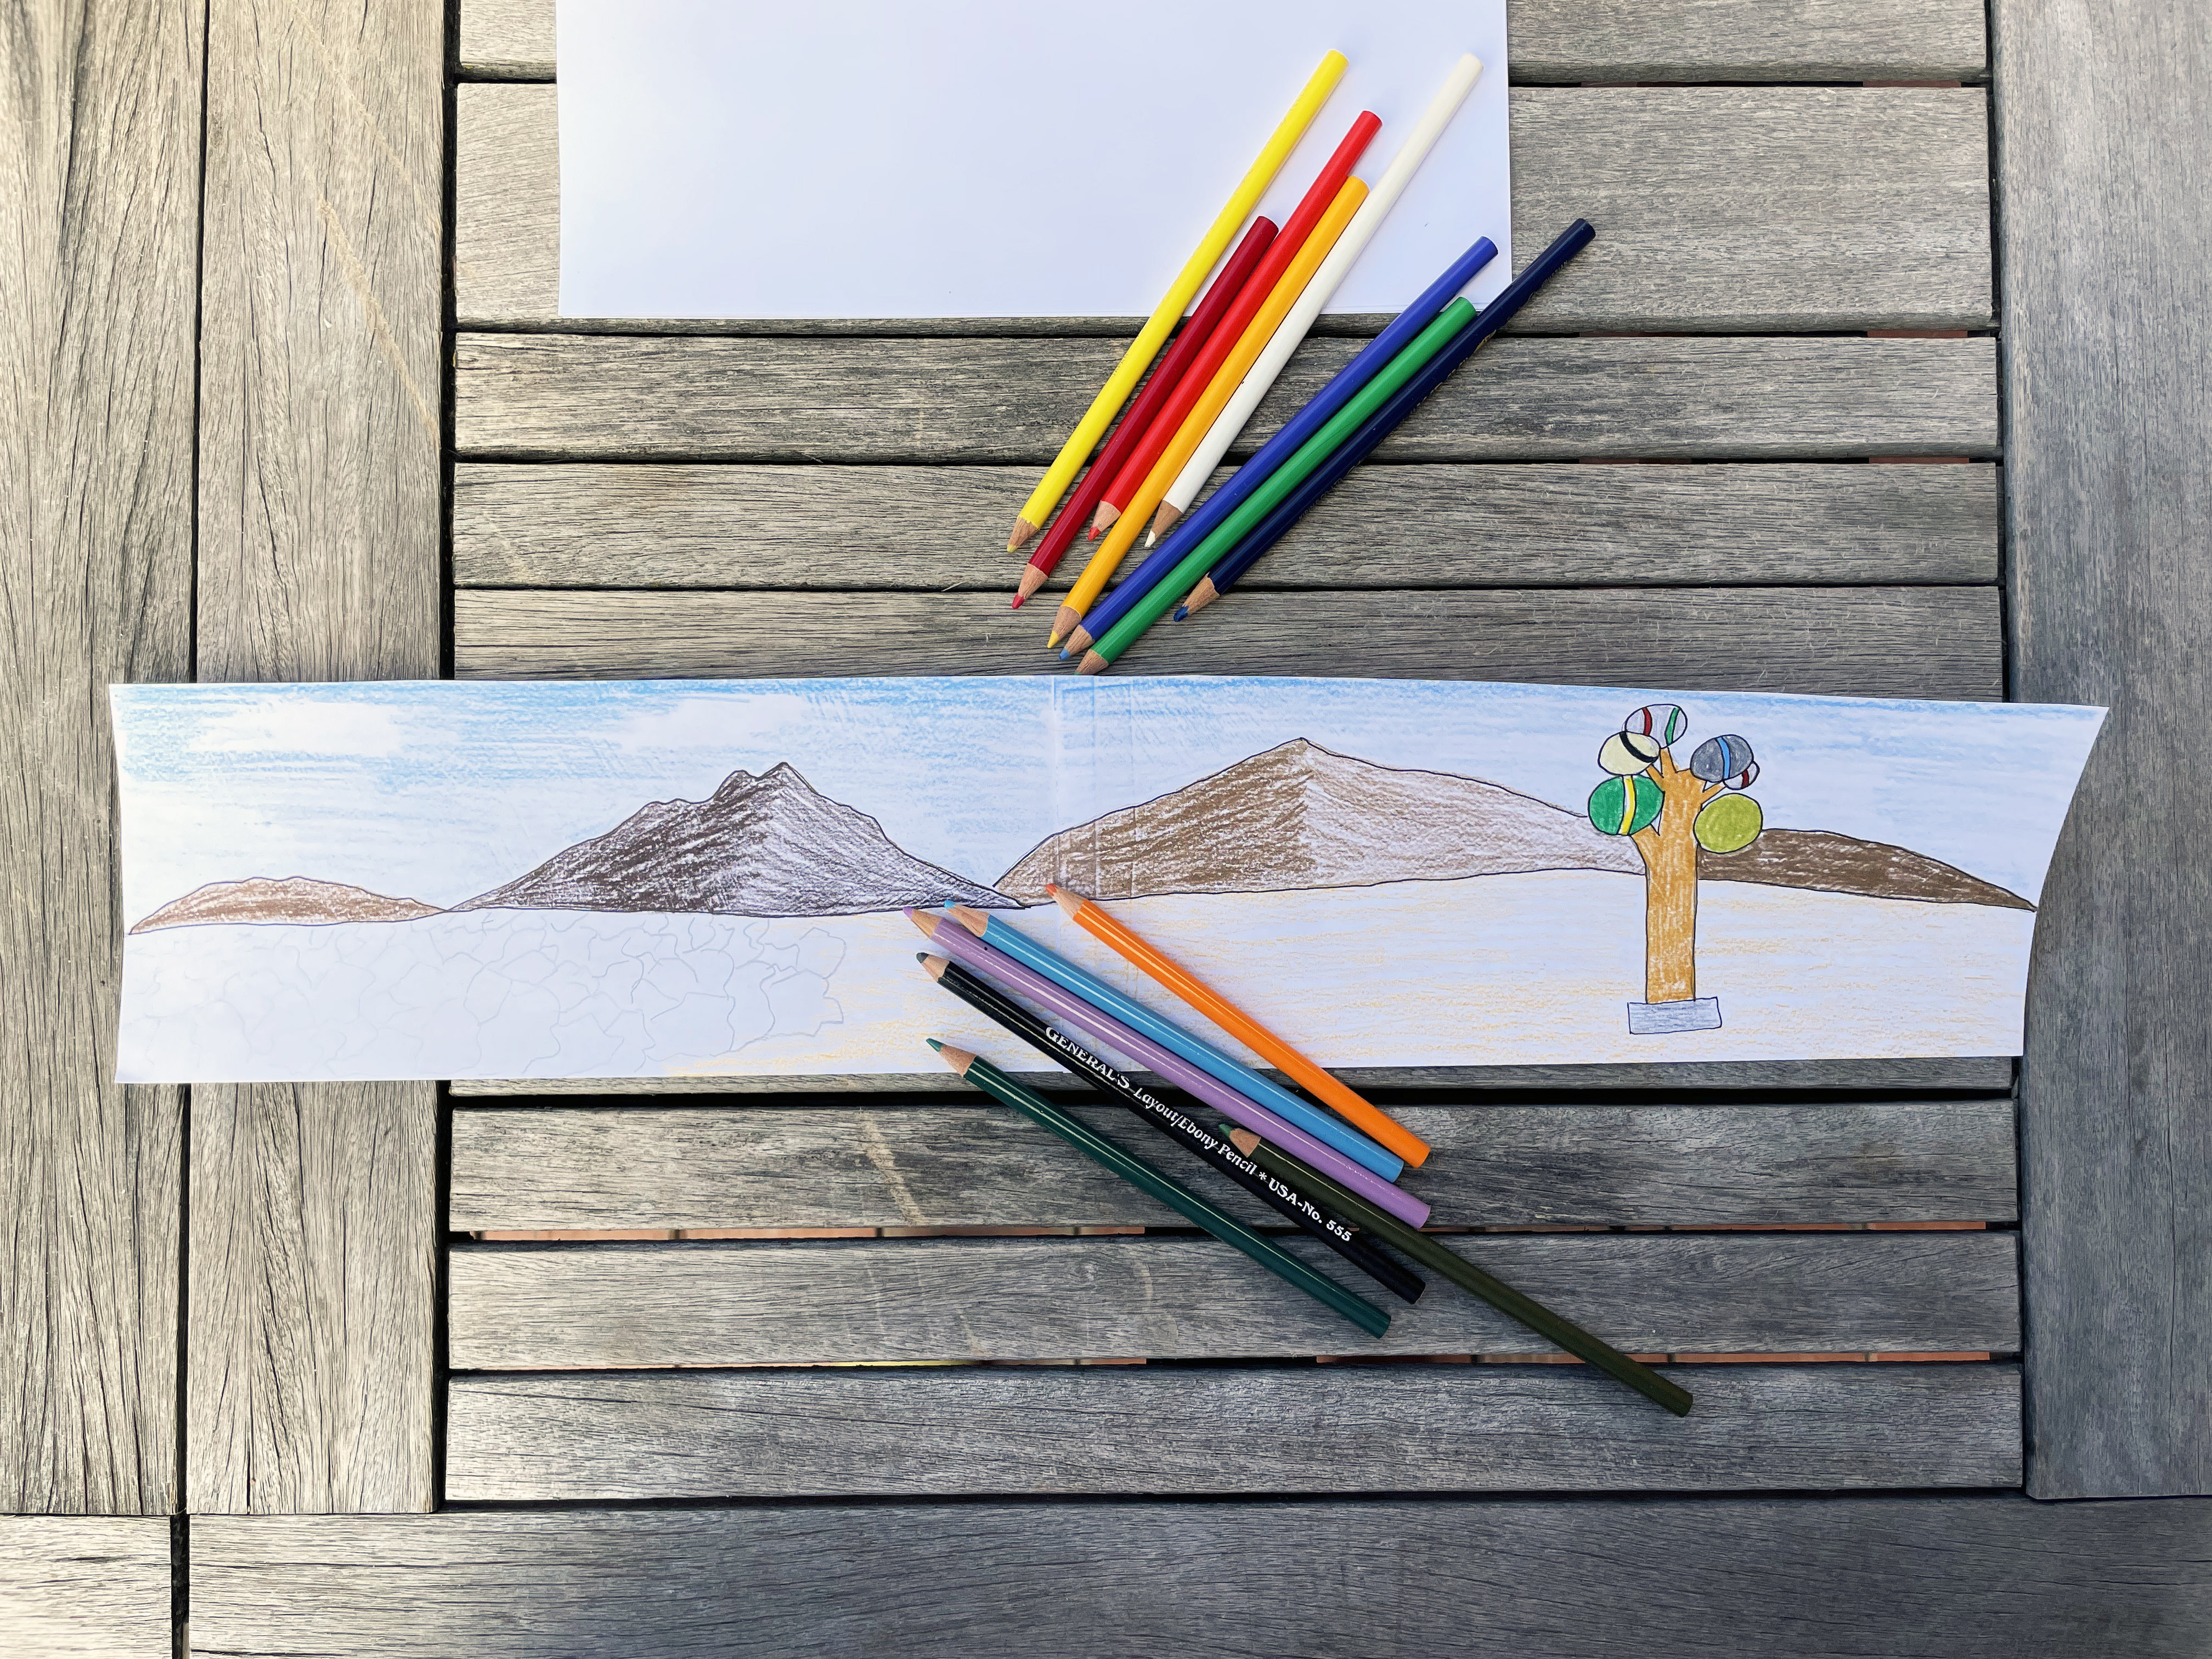
Measure your box length, double it and add about 2-3” This will be the length you will need for the background. It will be a little long but we will wrap it tightly around the tubes later.
Measure the height of the toilet paper tubes. This is the height of your background. Cut your paper to match the height and width that your background needs to be (you might need to tape two or three pieces together to make it long enough). Color your background. Remember, your background can be anything you want!
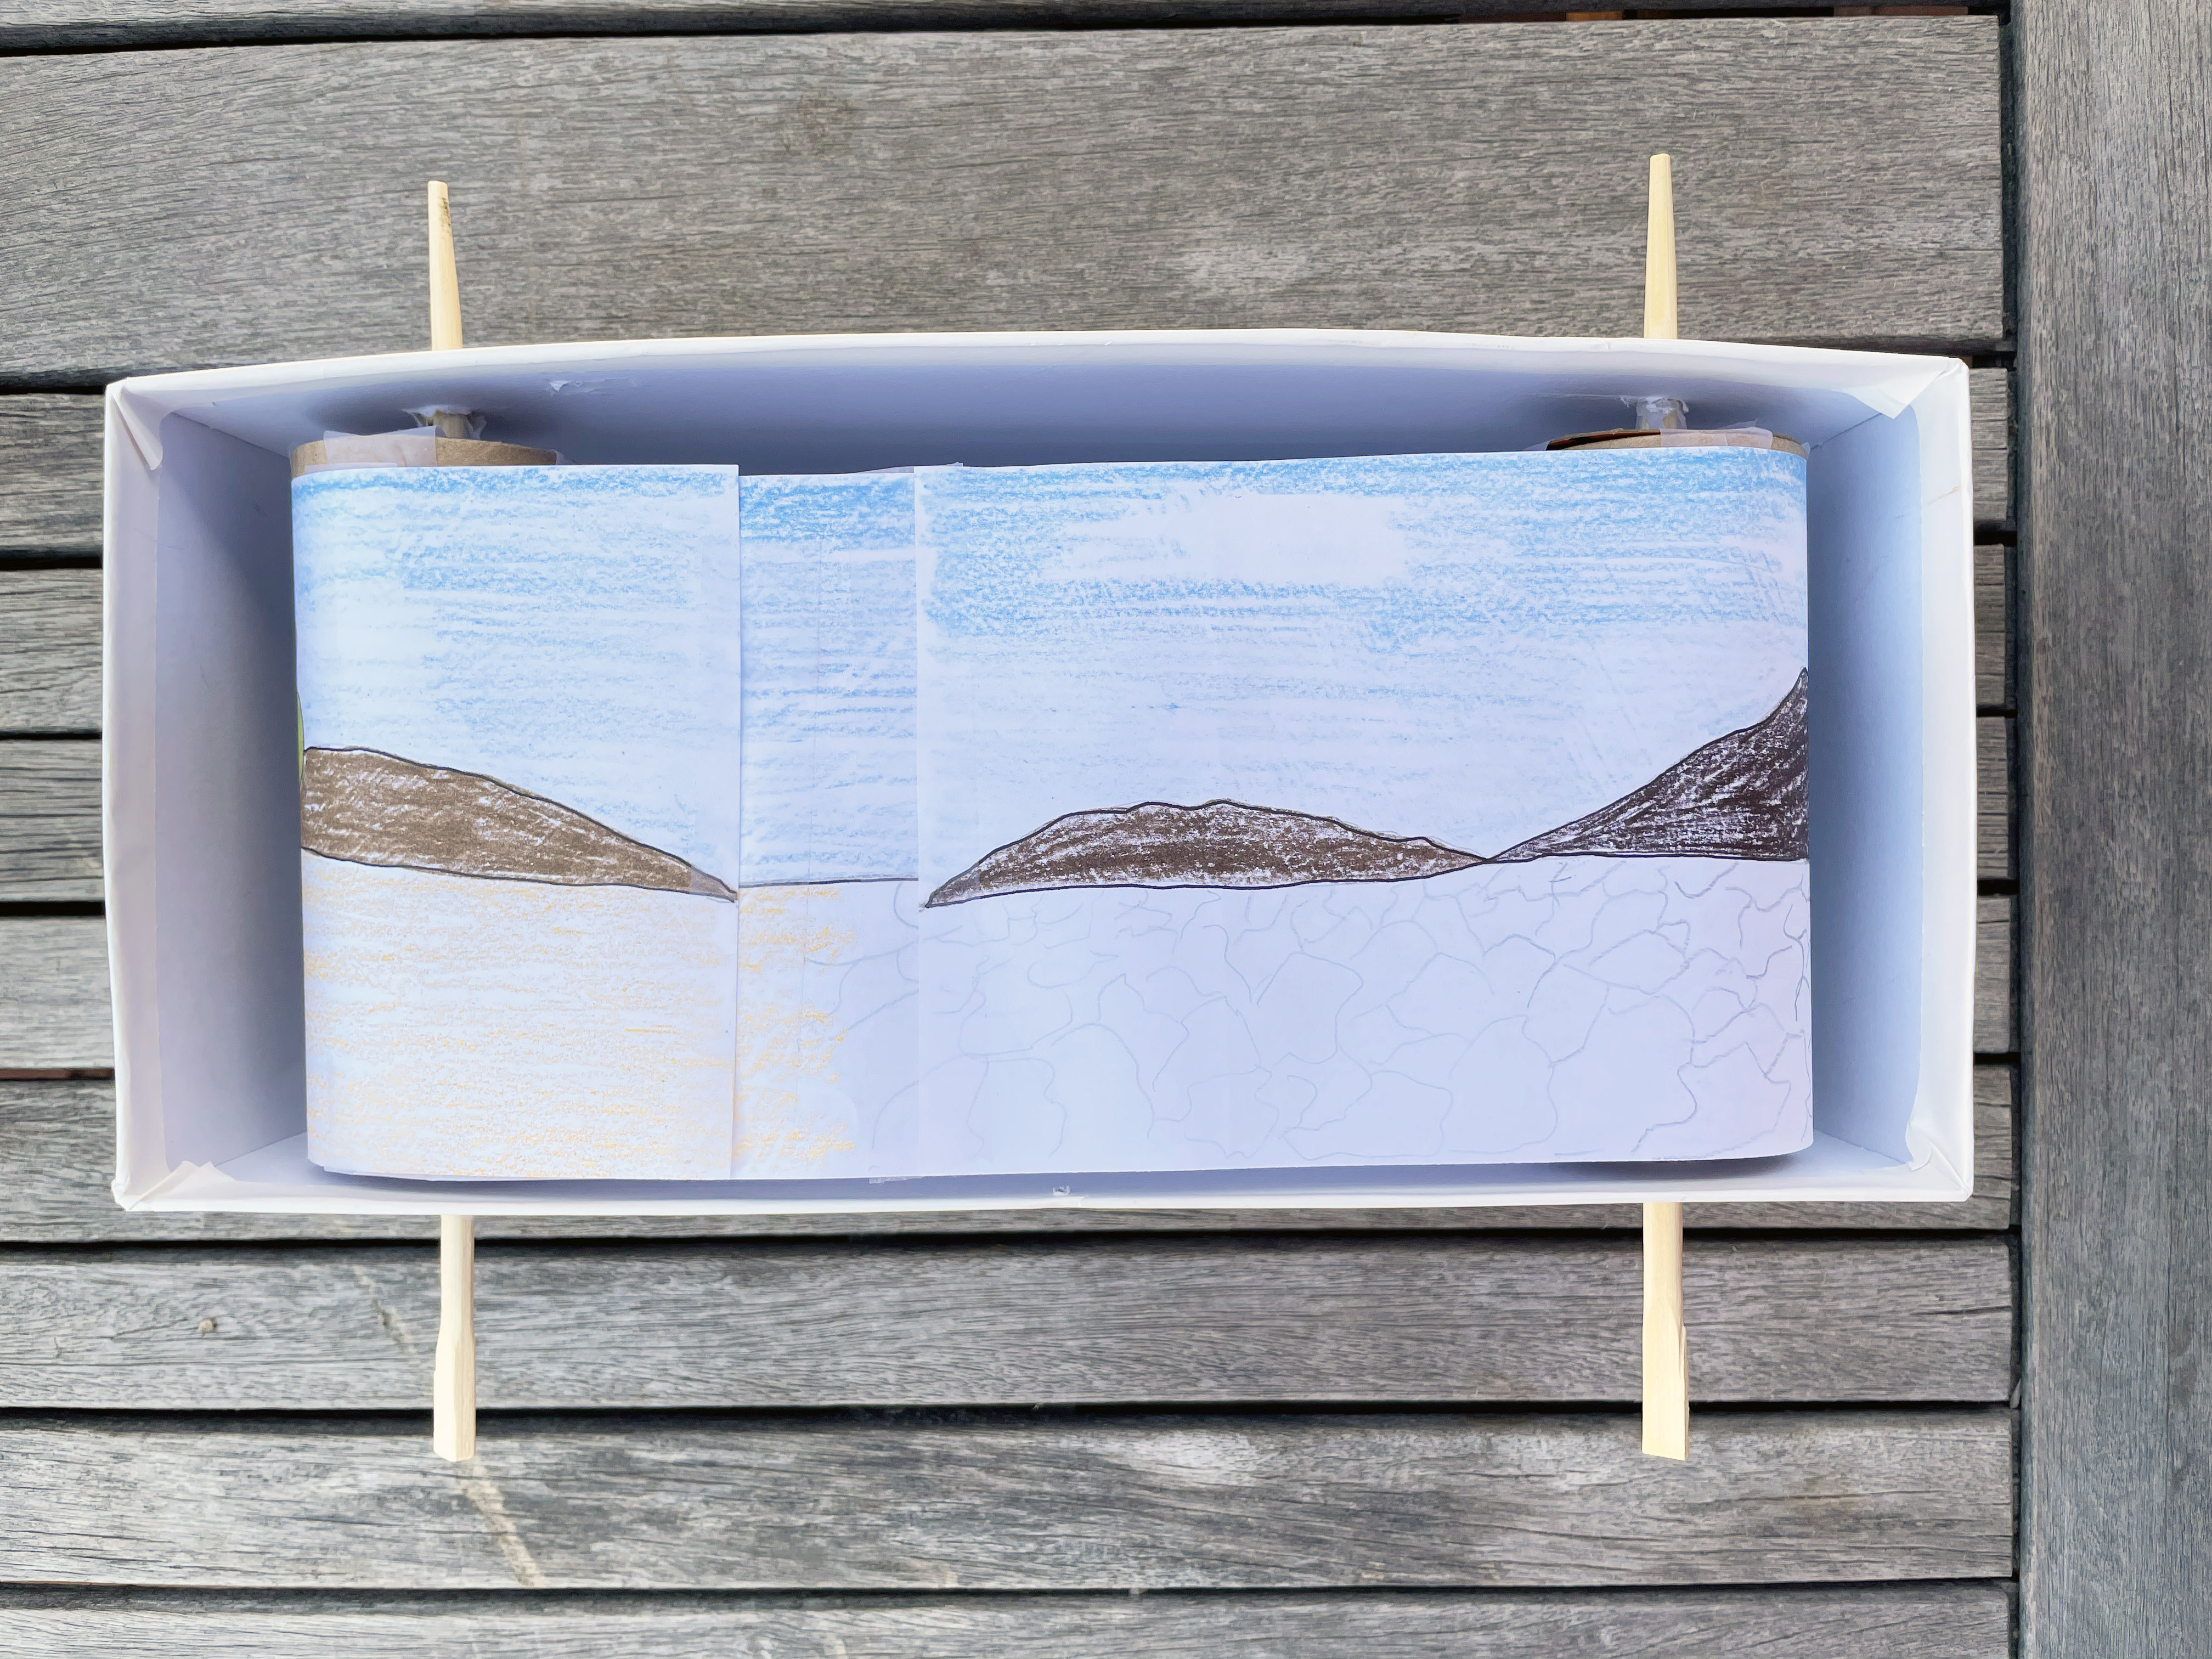
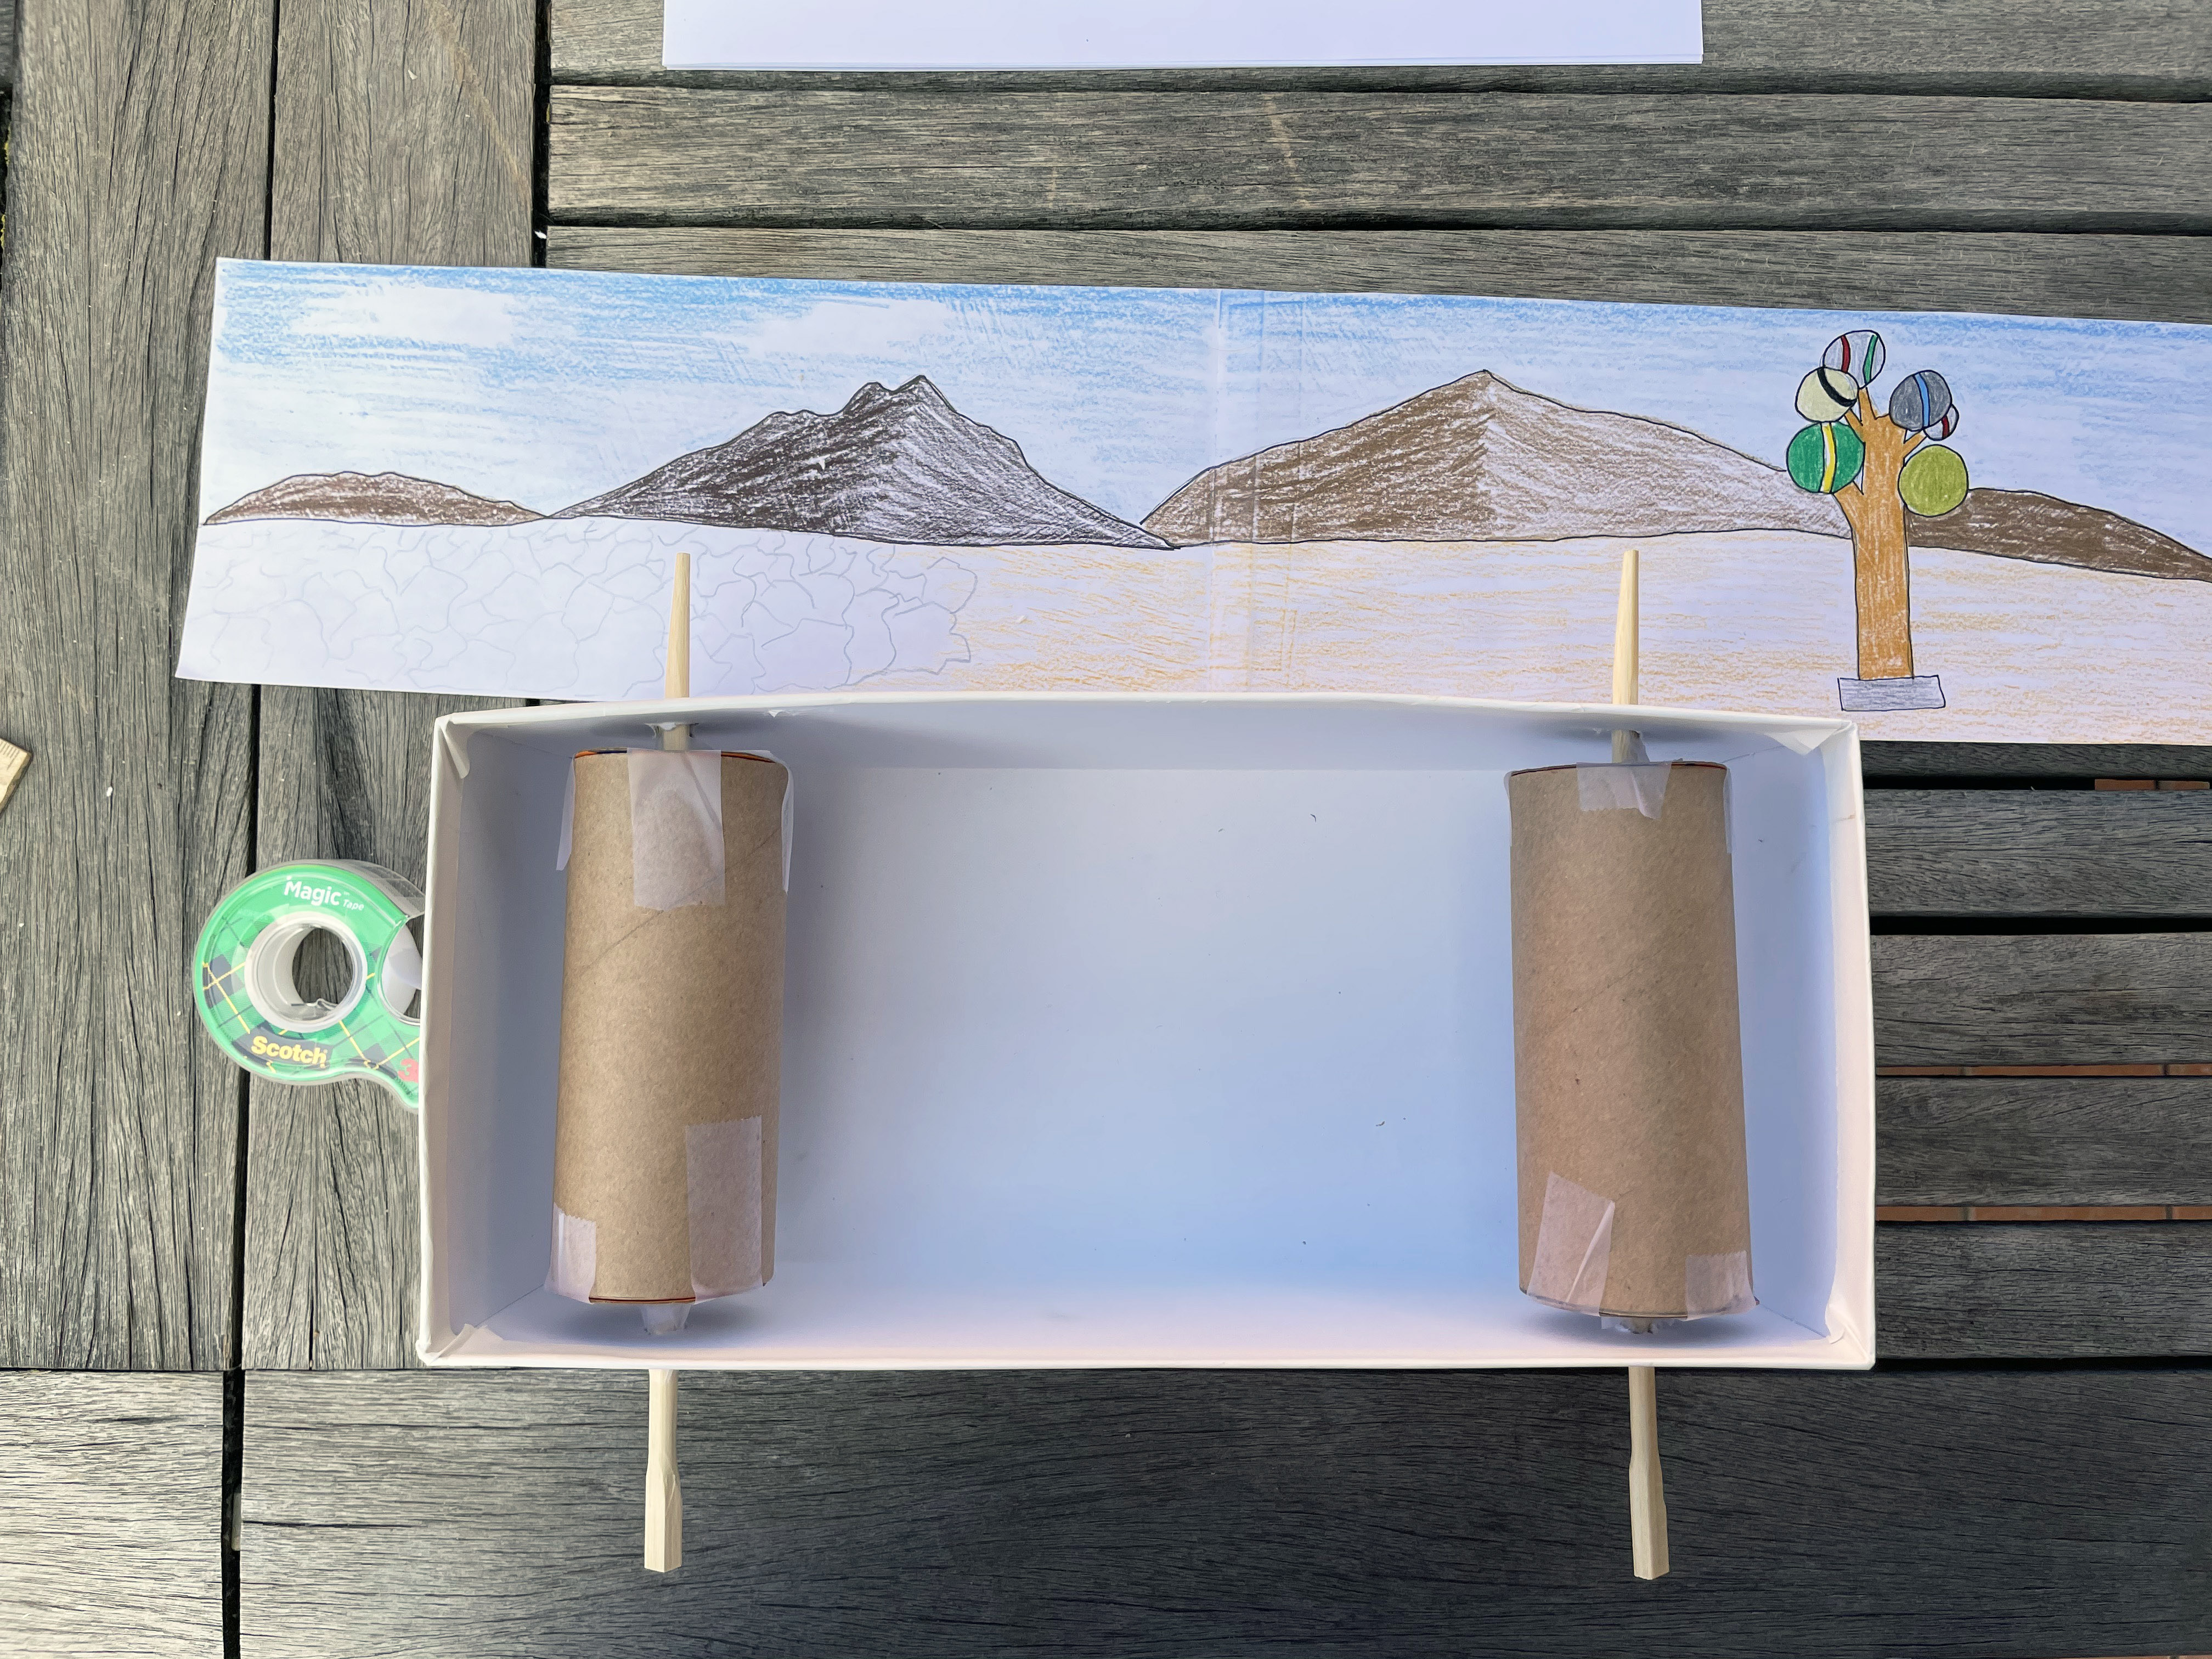
Wrap the background image around the tubes and stick the ends of the paper together with tape. The paper should be pulled as tight as possible.

Straighten the paperclip. Stick the still image that you want to be the focus of your movie onto the paperclip using tape.
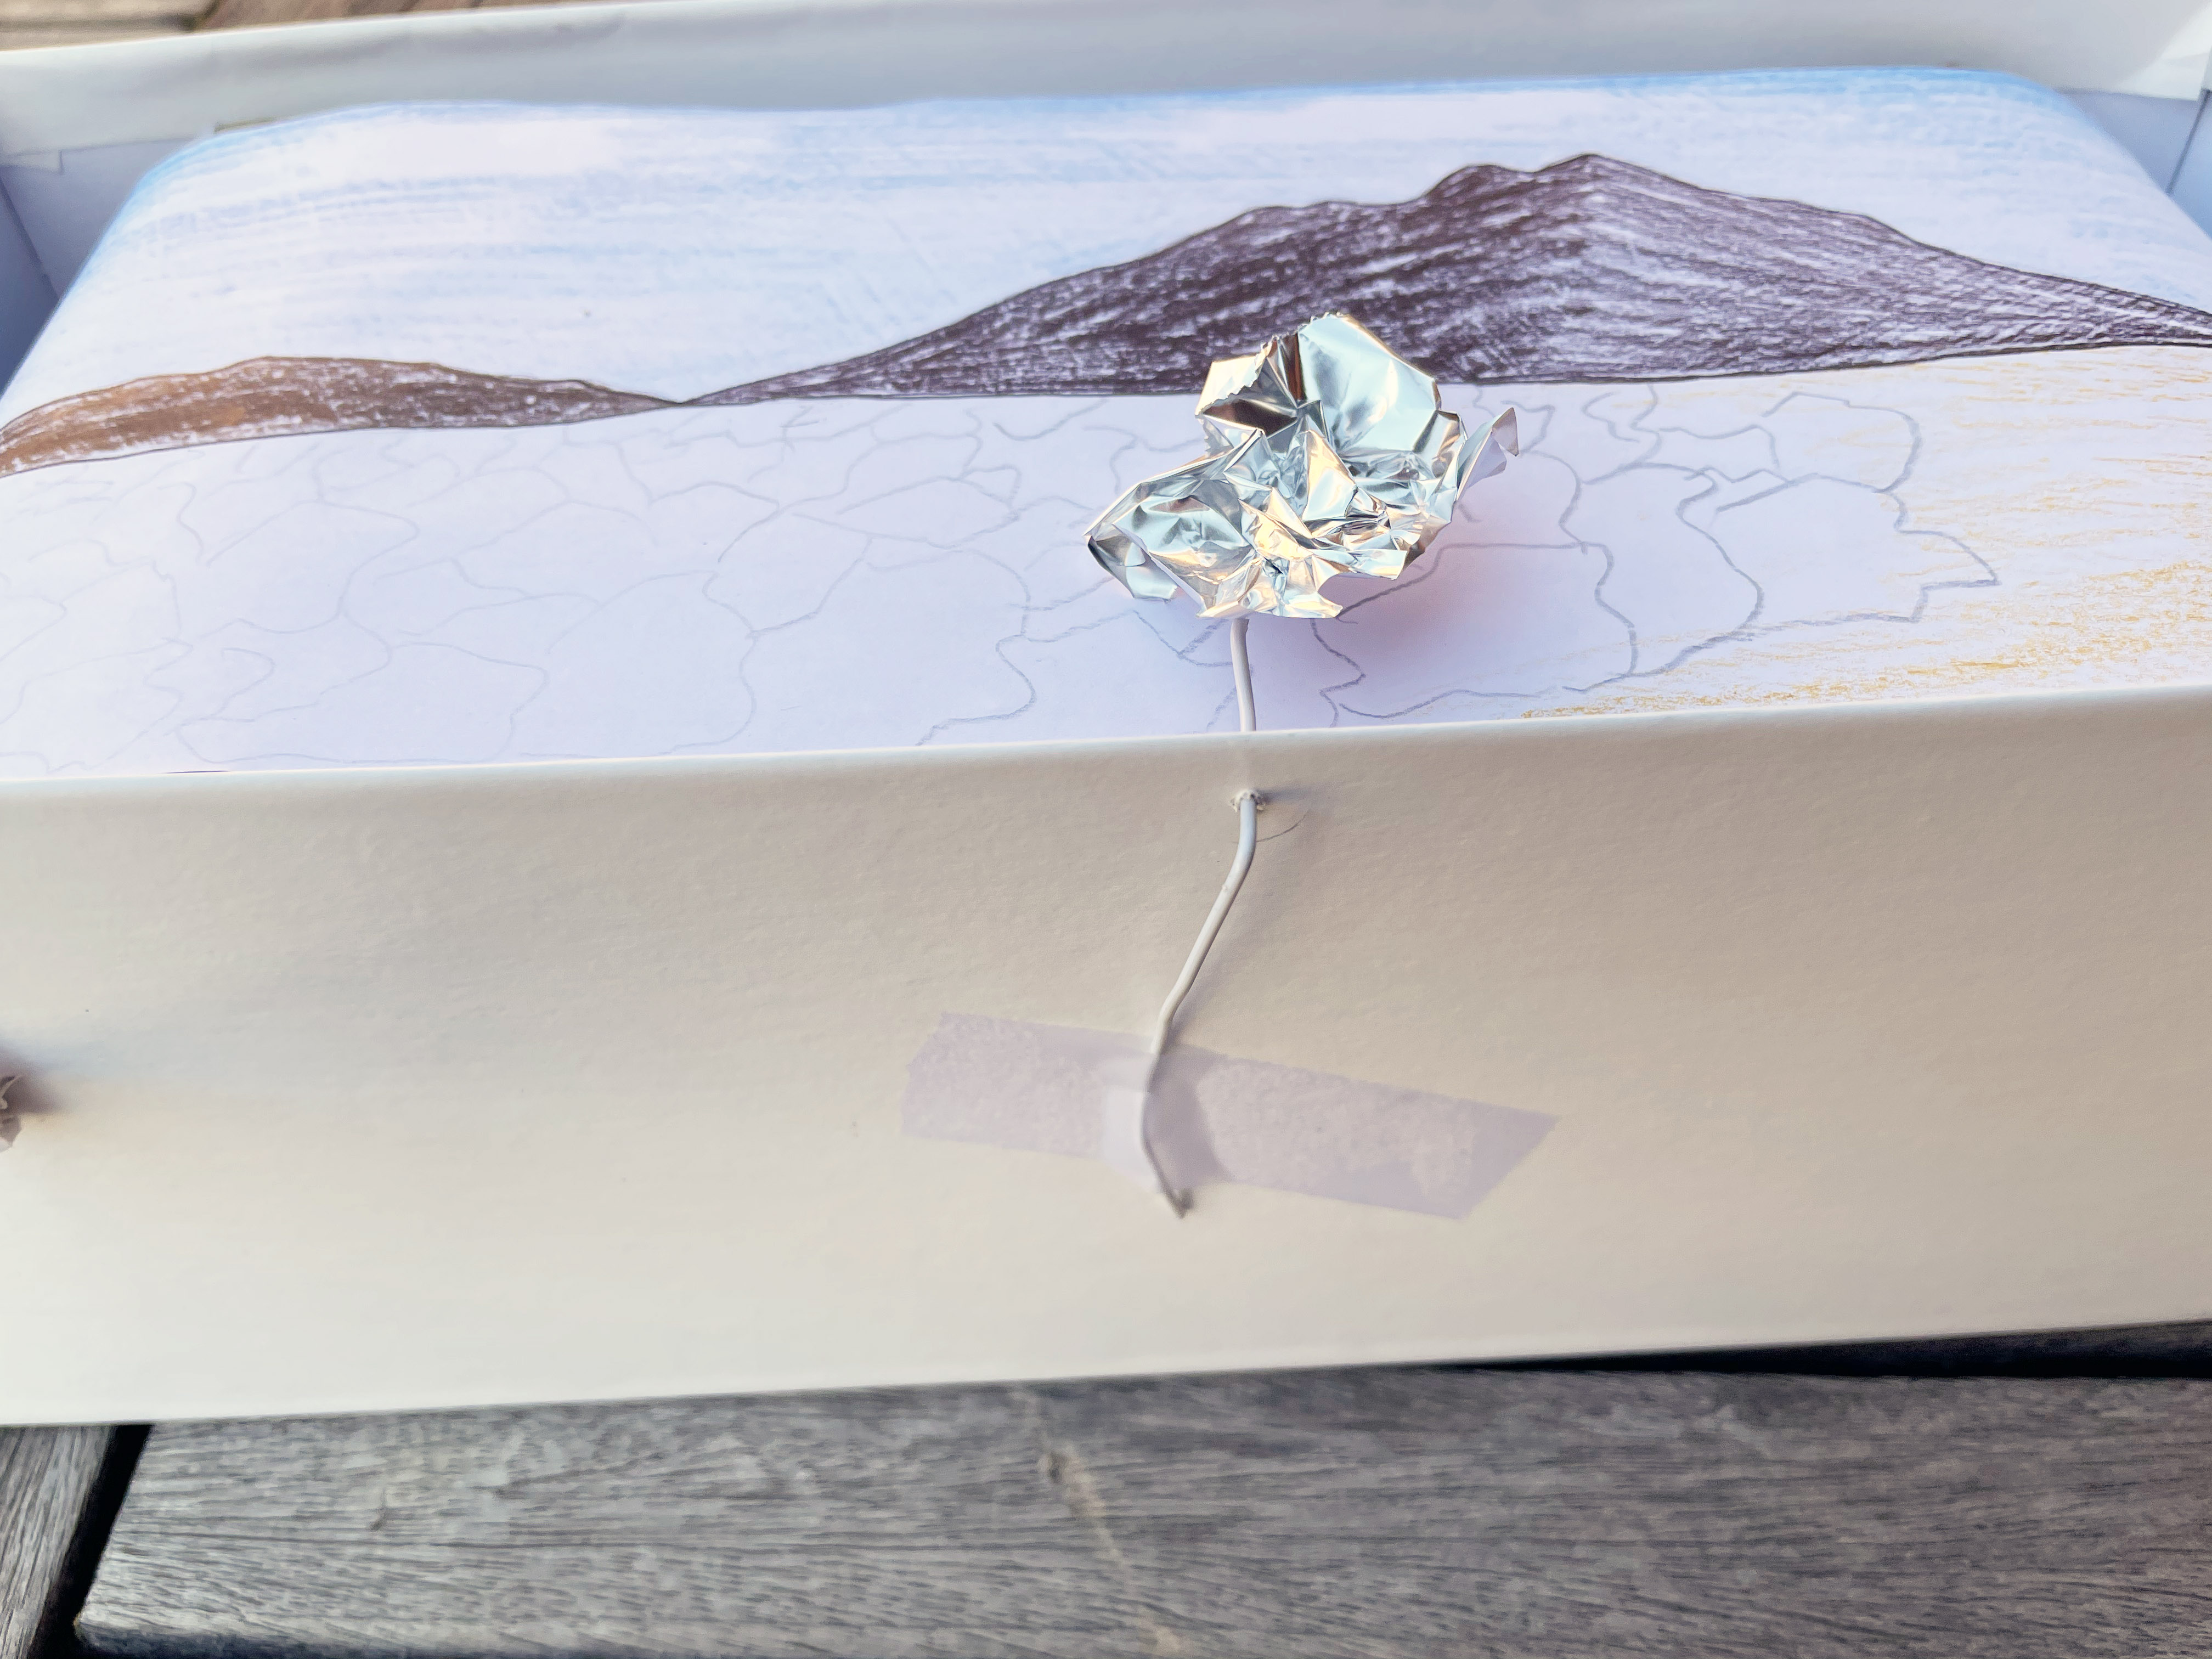
Poke the paperclip up through the bottom middle of the box. You might need to use the pushpin to get the hole started. Bend the paperclip so that it stays in place where you want it, then tape it in place.
Now you’re ready to watch your movie! Simply turn each of the dowels in the same direction. If you want to record your movie, you can have a friend move the background while you record from a camera or phone. Or try a stop-motion video! You can switch out the object that is the focus of your movie by making a new drawing and taping it to a paperclip.


Third Saturdays are funded by Salt Lake County Zoo, Arts & Parks